
Last updated:
June 4, 2026
Map Provider: Mapbox
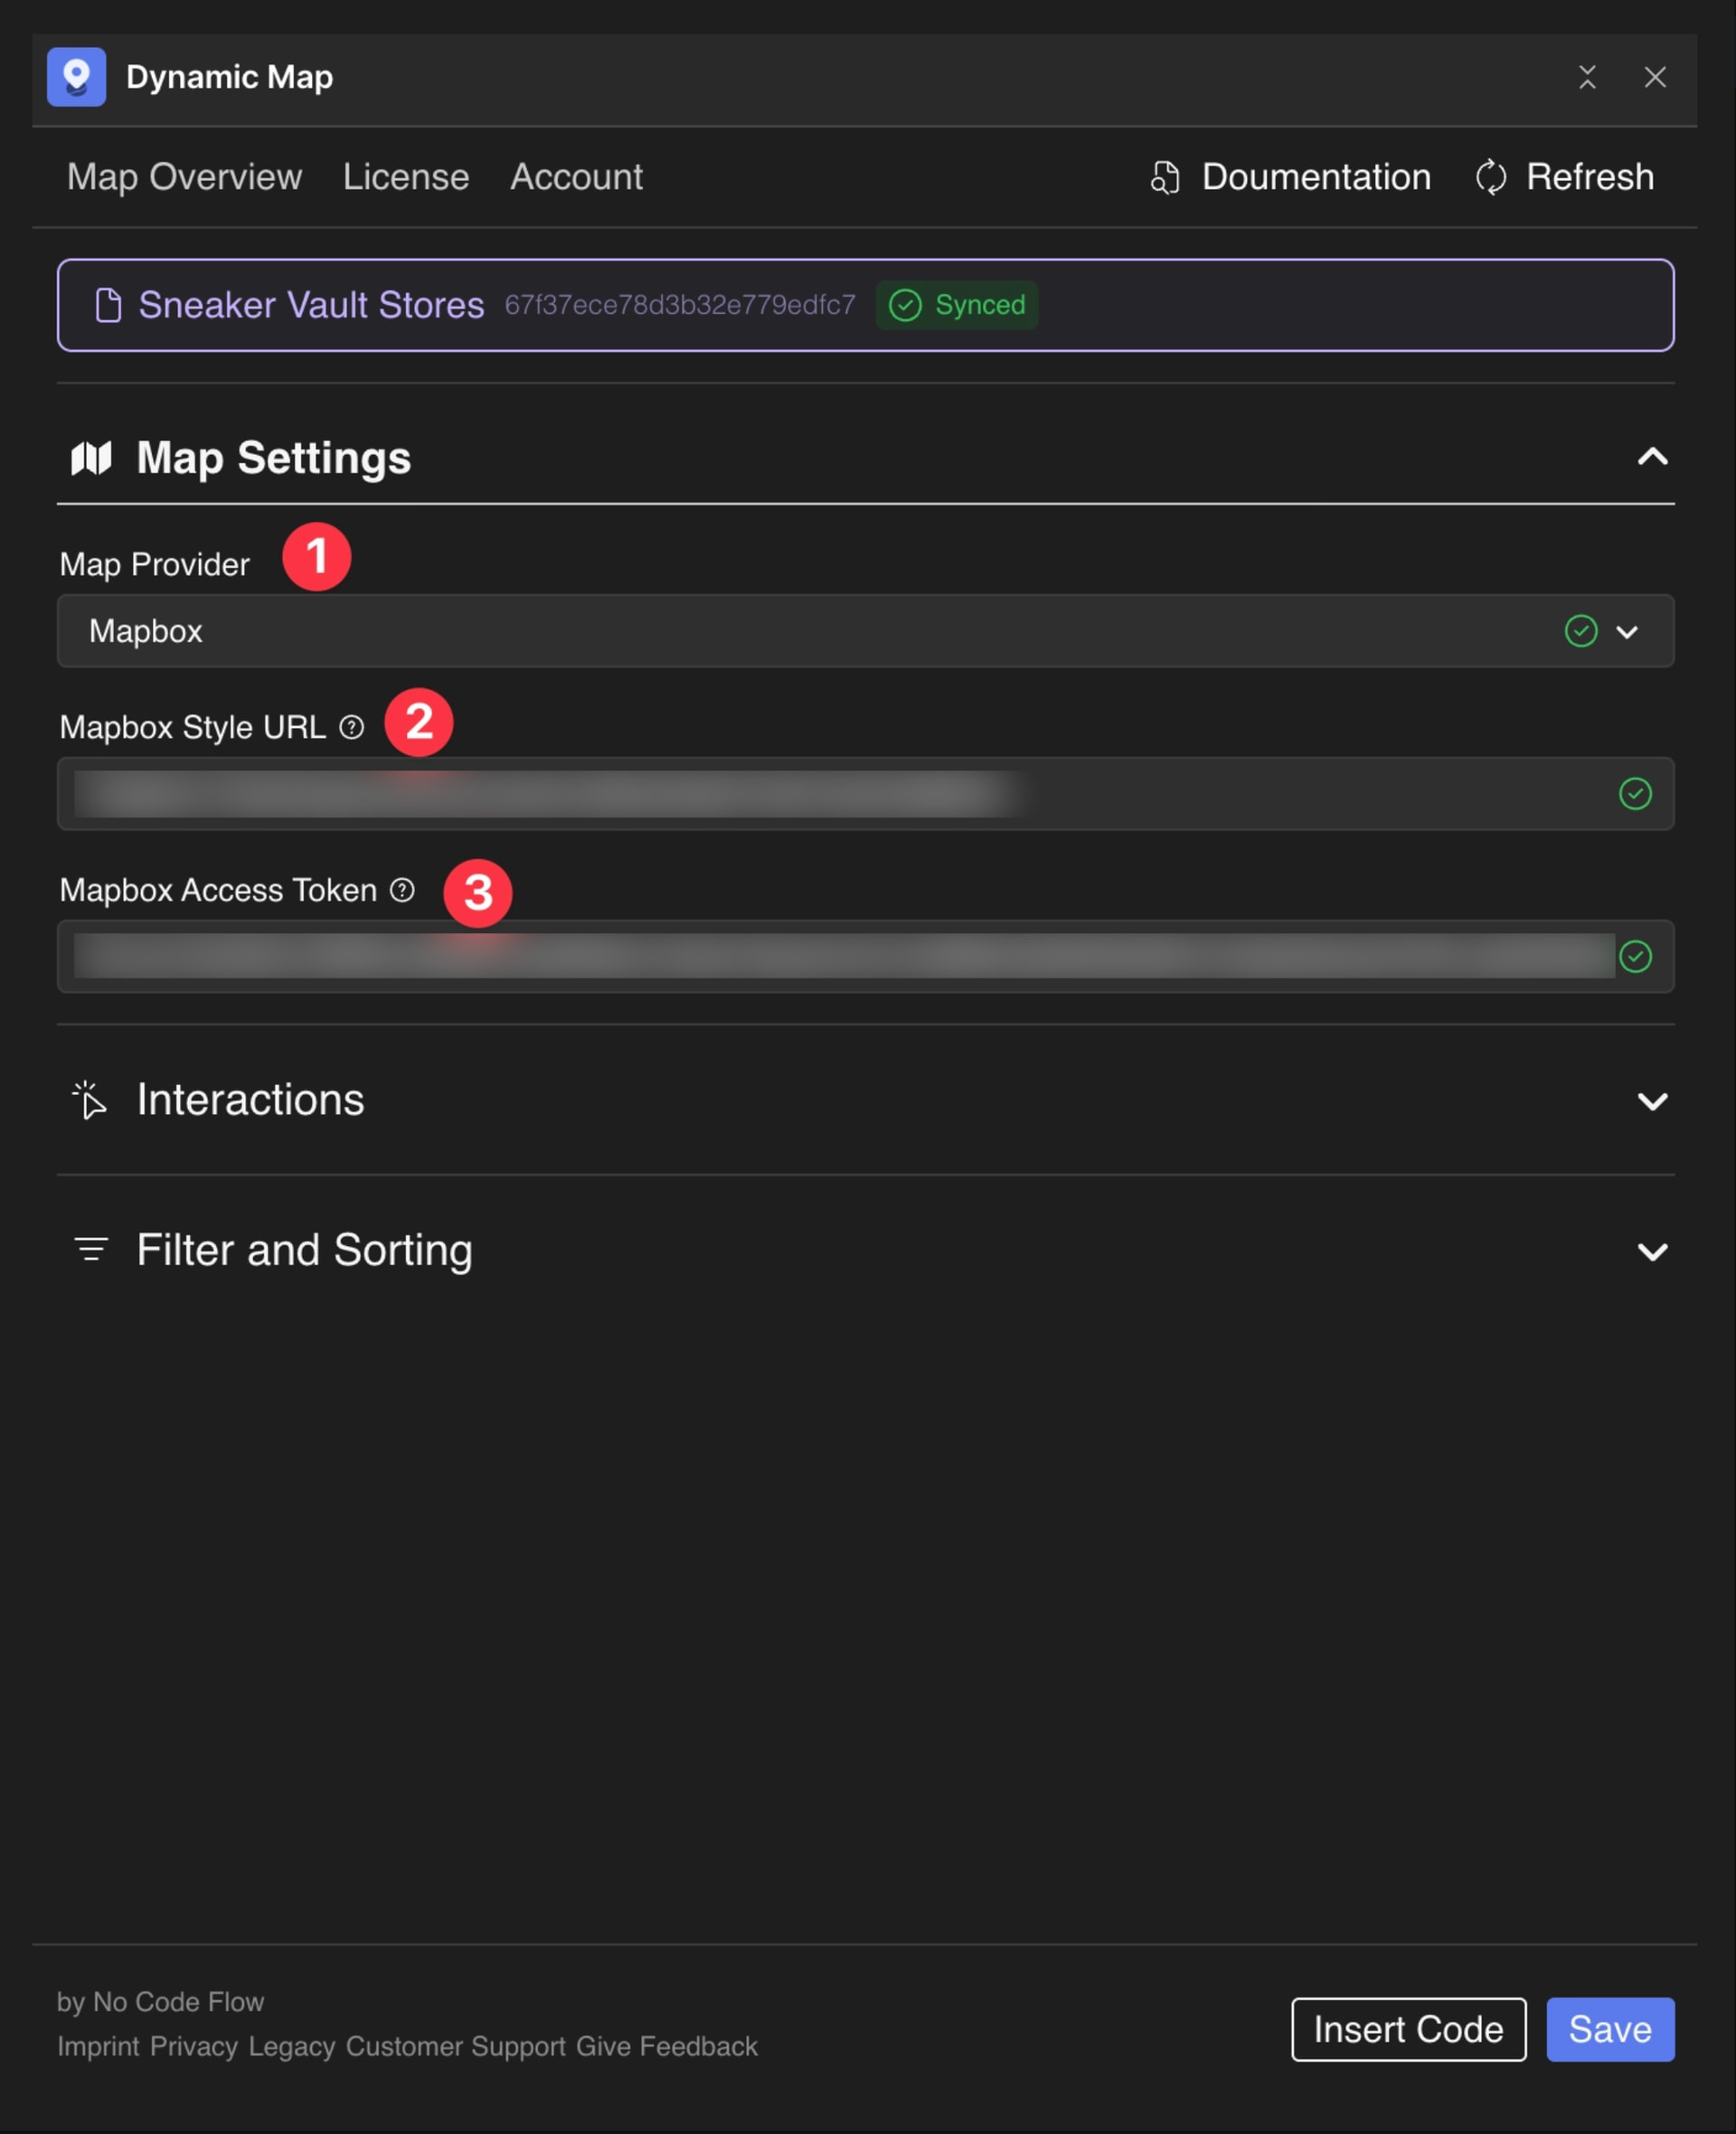
To use Mapbox with Dynamic Map for Webflow, switch the Map Provider to Mapbox in Map Settings, optionally set a custom Mapbox Studio style URL, and insert your Mapbox Access Token. Mapbox offers full visual control over map design but requires a paid account for higher usage volumes.
Mapbox gives you complete control over the visual design of your map. Through Mapbox Studio, you can customise every visual layer, including road colors, label fonts, water fills, and building heights, to create a map that looks like an extension of your brand. In Dynamic Map, Mapbox is also the only provider that supports address-based radius search, making it the required choice for store locators or service finders where users search by location.
Mapbox offers a generous free tier (50,000 map loads per month) which is more than sufficient for most Webflow projects. Beyond that, usage-based pricing applies.
Configure Mapbox
- In Dynamic Map, open Map Settings and change Map Provider to Mapbox.
- Change the Style URL if desired. To create a custom style, follow this Mapbox tutorial.
- Insert your Mapbox Access Token.
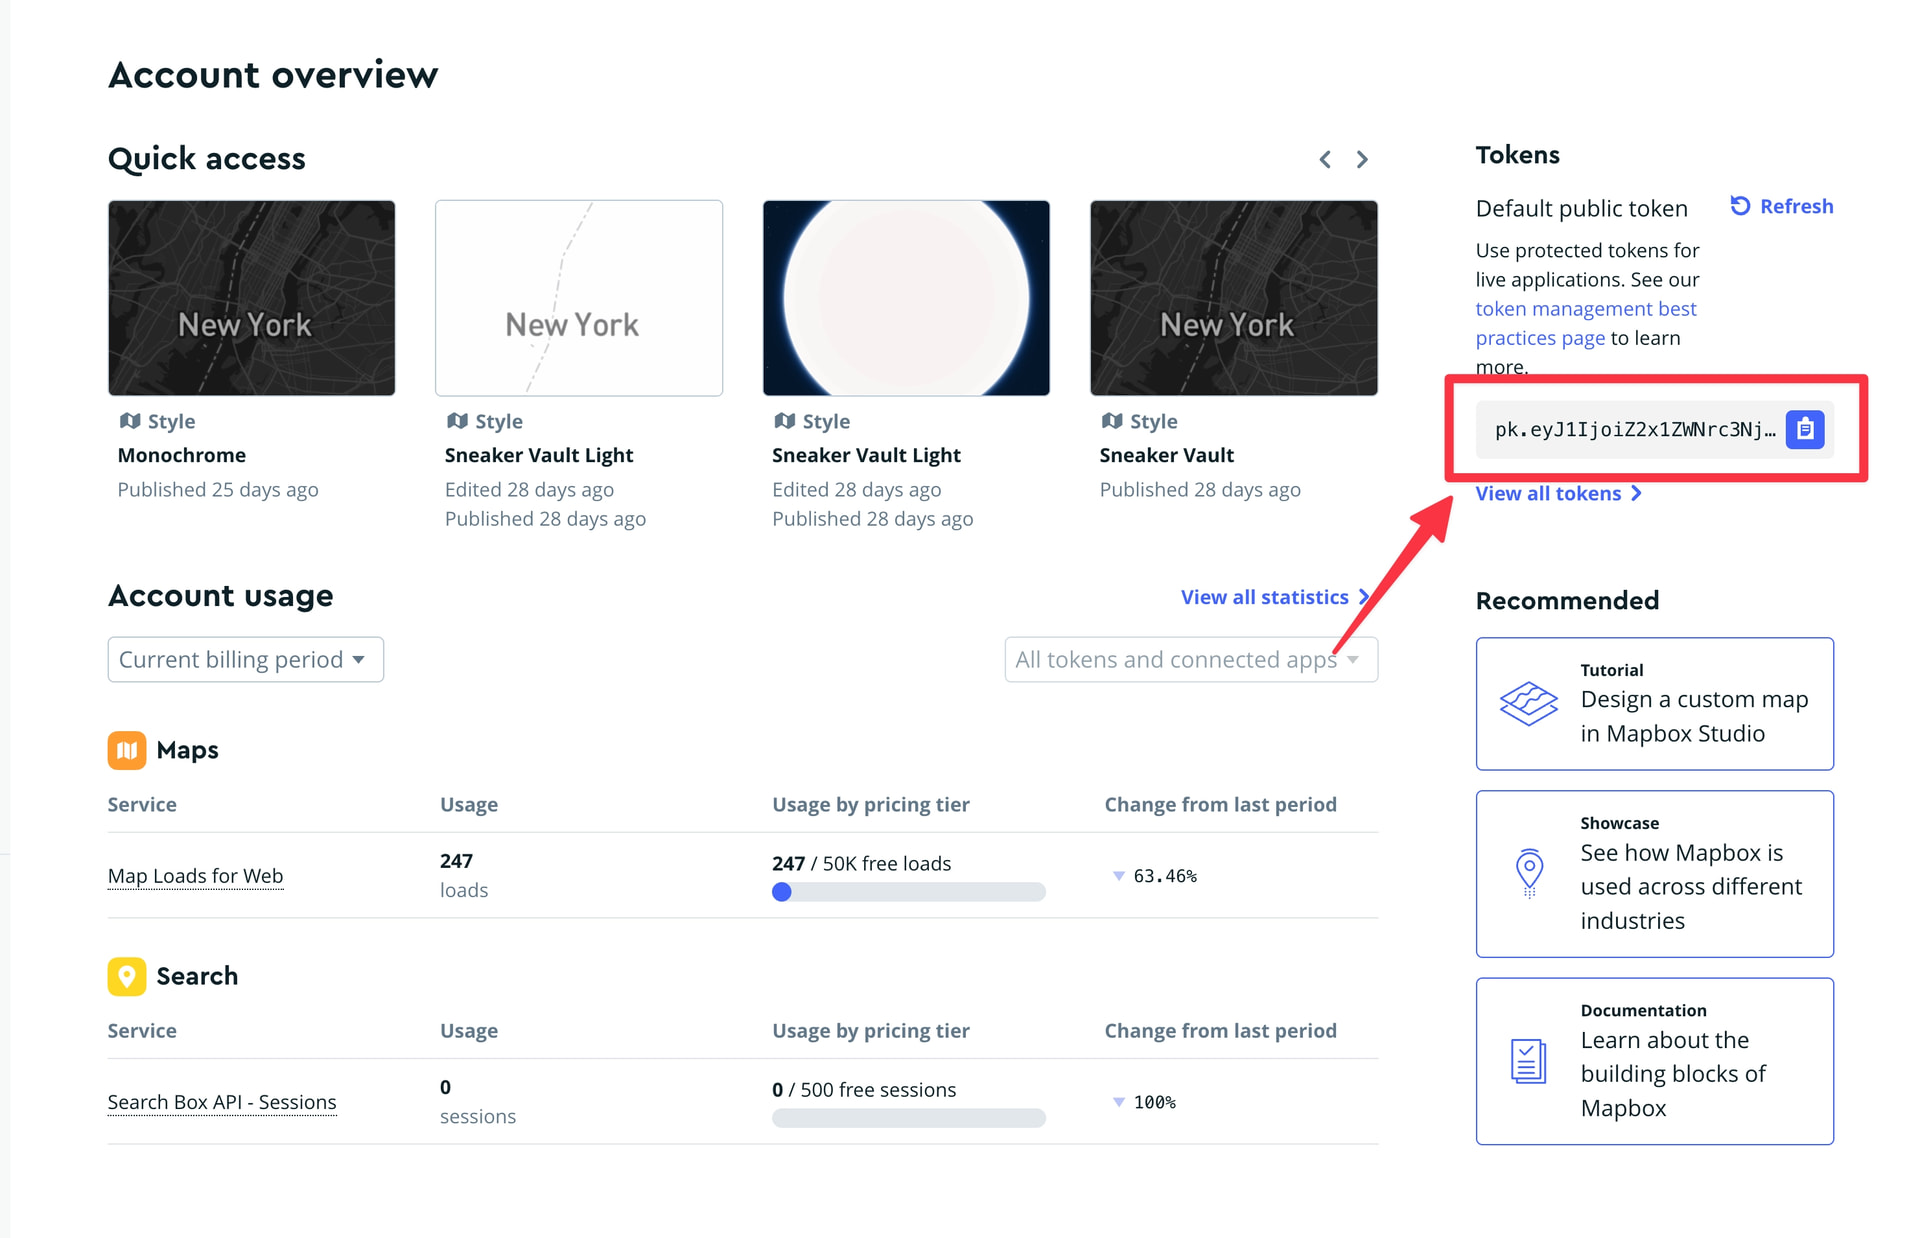
Don’t have a Mapbox account yet? Sign up here.
💡 Prefer no API key or billing concerns? Consider MapLibre. It’s free and open-source with no usage limits.
Practical Tips
- Check the free tier before setting up billing. Mapbox’s free tier includes 50,000 map loads per month. For most Webflow sites, this is more than enough.
- Restrict your access token to your domain. In Mapbox Studio, set Website Restrictions on your access token to your live domain only. This prevents unauthorized use of your token and protects your free tier usage.
- MapLibre also supports custom styles. If your goal is a custom-branded map but you don’t need address search, MapLibre can achieve most of the same visual results through Maputnik, with no API key and no usage limits.